No, You Shouldn't Kick a Tree: What Shin Conditioning Actually Does (and How to Build Shins That Don't Quit)
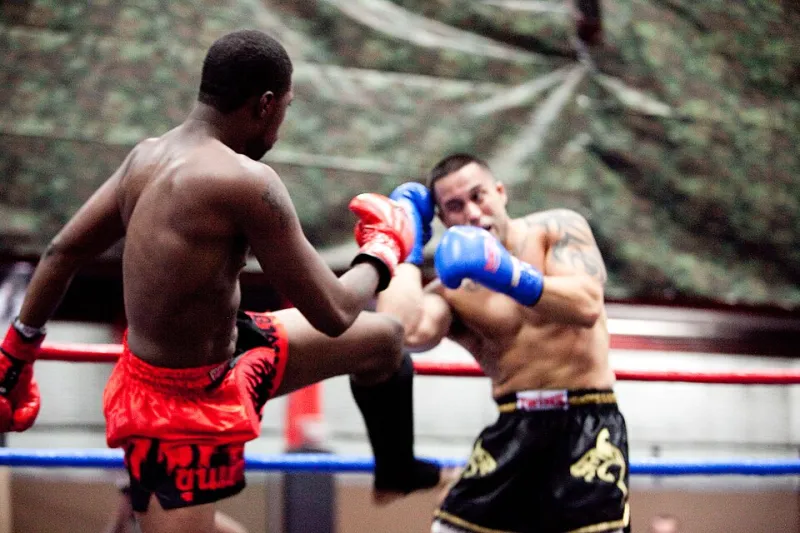
Photo: David Maiolo, CC BY-SA 3.0, via Wikimedia Commons
Every beginner in every American Muay Thai gym has heard some version of the same story: in Thailand, kids kick banana trees until their shins turn to iron, and if you want real shins, you'd better start beating yours with a stick.
It's a great story. It's also mostly nonsense, and acting on it is a fast track to lumpy, bruised shins and weeks off the mats. Let's separate what's real from what's folklore — and then build shins the way they actually get built.
The Tree Story, Corrected
Yes, Thai fighters historically kicked banana trees. But banana trees are soft, fibrous, and give way on impact. They're closer to a heavy bag than to an oak. The image of nak muay whacking their shins against solid bamboo to toughen up? That's the movie version — Kickboxer did a lot of damage here.
The trees were a substitute for training equipment, not a conditioning method. In Thailand today, almost everyone kicks a heavy bag. So should you.
What 'Conditioned Shins' Actually Are
Here's the science, minus the bro-talk. Shin conditioning works through two mechanisms:
Bone remodeling. When you repeatedly apply moderate impact stress to the tibia, the body responds by increasing bone density along the front of the shin. This is the same Wolff's Law that makes bones adapt to load in any sport. It's real, it's slow, and it requires recovery — bones get denser during rest, not during the beating.
Desensitization. The surface tissue gets used to contact. Nerves don't die or get 'deadened' — you simply stop flinching because your brain recalibrates what's normal. This is why a fighter with years of bag work shrugs off a shin check that would put a beginner on the floor.
Notice what's missing from that list: scar tissue as a goal. Bruised, lumpy shins aren't conditioned shins. They're damaged shins. A hard, raised knot on your shin is calcification from trauma, and while some veteran fighters carry them like badges, chasing them deliberately is like chasing a concussion because it means you trained hard.
The Theater: What to Skip
Rolling bottles and sticks over your shins. This does nothing for bone density — you're not generating enough force to stimulate remodeling — and the 'toughness' it builds is mostly just learning to tolerate a dull, pointless pain. If you enjoy the ritual, fine. But don't confuse it with conditioning.
Deadening nerves on purpose. You want your shins sensitive. Sensitivity is feedback. Numbness is how you miss a stress fracture until it becomes a real fracture.
Kicking hard things while fresh. Slamming full-power roundhouses into a rock-solid bag or a wall on day one isn't conditioning — it's just trauma with extra steps.
What Actually Works
The good news: the stuff that builds real shins is already in your training plan. You mostly just need to do it progressively.
-
Heavy bag rounds with increasing intensity. Start rounds at 60-70% power, focusing on clean contact with the lower shin, not the instep. As weeks pass, ramp up. The bag should be firm, not rock hard and not a pillow.
-
Checking drills with a partner. Light, controlled check-versus-kick exchanges build both desensitization and the reflex. Start with taps. This is also how you learn that getting checked isn't a catastrophe.
-
Controlled sparring exposure. Nothing conditions confidence like real contact at sparring intensity. Legs get touched, you survive, repeat.
-
Recovery. Protein, sleep, and actual rest days. Bone remodels when you're off the mats.
Your 8-Week Shin-Proofing Protocol
Run this alongside normal training — it's a layer, not a replacement.
Weeks 1-2: Contact baseline. Three bag sessions per week, all roundhouses at 60-70% power, 2-3 rounds each session. Focus on rotating the hip and connecting with the mid-to-lower shin. No partner work yet.
Weeks 3-4: Add checks. Same bag volume, now at 70-80% power. Add one short partner drill per week: 3 rounds of light kick-and-check exchanges, both fighters at maybe 30% intensity. Ice or nothing afterward — skip the fancy recovery gimmicks.
Weeks 5-6: Power rounds. One heavy session per week with 2 rounds of 80-90% power kicks on a firm bag. Keep the light partner checks going, maybe bump to twice weekly if your shins are responding well.
Weeks 7-8: Integration. Full-power bag work twice a week, partner checking at 50% intensity, and one light sparring session where leg kicks and checks are allowed. By now, a checked kick should sting — not wreck your week.
Ongoing: Shins are maintained, not achieved. Keep the bag work in rotation and the density stays.
Know the Difference: Bruised vs. Conditioned
A bruised shin is sore to the touch, discolored, and makes you walk funny for a few days. A conditioned shin feels fine at rest, doesn't swell, and only complains during hard contact — then recovers fast.
If you're constantly bruised, you're doing too much too soon. Pull back, add a rest day, and let the adaptation catch up. The nak muay with the best shins in your gym didn't get them from a rolling pin. They got them from ten thousand kicks on the bag, a few thousand checks, and a lot of patience.
The tree was never the point. The kicks were.